How to change the canvas size in GIMP
In this article, you will learn how to adjust the size (increase or reduce) of the canvas in GIMP.
The canvas in GIMP, just like in oil painting refers to the entire area you have for working with.
When creating a new image in GIMP, the dimensions (width and height) you enter by default become the dimensions of the image canvas. The canvas by default takes the set background color in GIMP, or may be transparent or take foreground color depending on the "Fill with" option of the advanced options that you select when creating the image.
This is the visible area in which you can add images, patterns, shapes, texts, and other objects. It's basically the actual workspace.
If you open an image in GIMP, its dimensions are by default equal to the canvas size.
The image and canvas sizes are always equal by default when working with a single layer.
If you drag a new image onto an already opened image in GIMP, it will be opened as a new layer of the existing image, and part of it may be hidden from view if it's larger than the canvas. If it's smaller or equal to the canvas then it will fit within it.
When creating a new layer (Ctrl+Shift+N), its dimensions are prefilled by default to coincide with those of the canvas but you may choose to change them.
Therefore, the canvas size may be larger or smaller than that of the layers.
If any layer data lies outside of the canvas, it will automatically be cropped out when the image is flattened (layers are merged) or exported.
In case the canvas is too big or too small for the project you're working on, you can adjust its size.
Changing the canvas size allows you to change the pixel dimensions of the image without changing the size of anything displayed on the canvas.
Increasing the canvas size gives you room to expand the working area. This adds a blank area around the image (or fills it with the background color if the image has only one layer).
On the other hand, decreasing the canvas size will crop the image and remove some parts.
Unlike changing the image size, changing the canvas size has no effect on the image resolution.
Changing the canvas size of an image in GIMP
Follow the steps below:
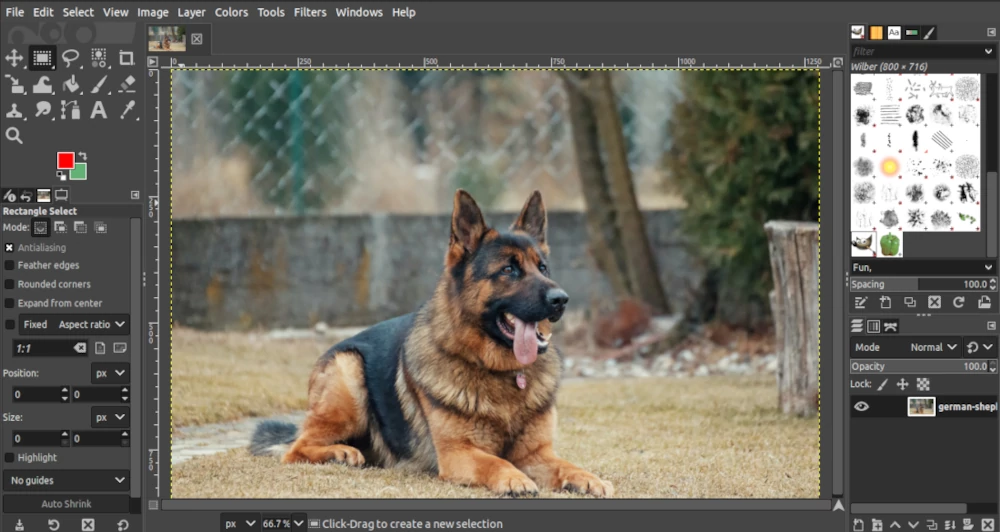
Step 1: Open or create a new image document in GIMP.
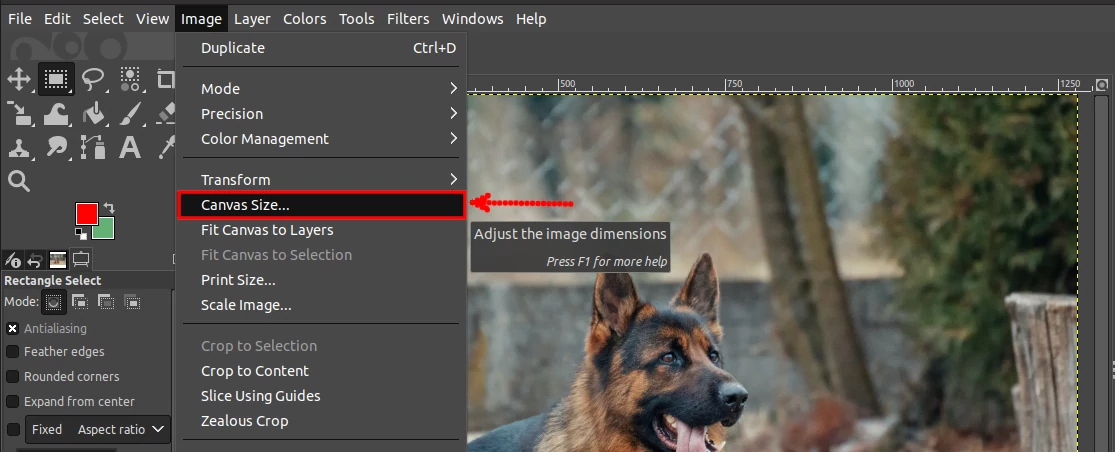
Step 2: Open the Image menu at the top of the GIMP window or by right-clicking on the image. Then click on the Canvas Size option.
Step 3: A new window will open, showing you the current width and height of the canvas. Place the cursor on those boxes to change their values. You can also click on the arrow icons on the right side of the values to increase or reduce them.
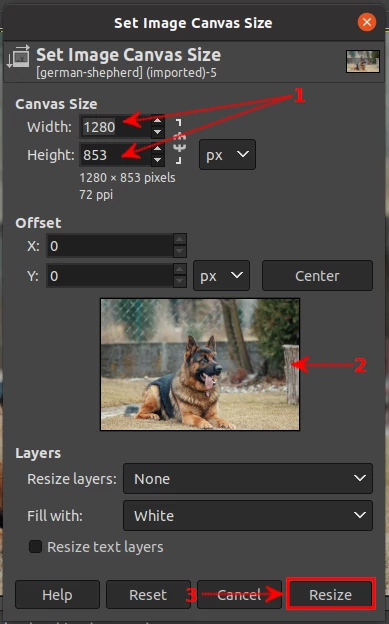
The image preview is shown in between the Offset and Layers sections. You can click on the image and drag it to reposition it on the canvas once its dimensions are changed.
Once you are okay with how the image looks on the new canvas size, click on the Resize button at the bottom of the window.
In case the image size is larger than the canvas and you want to adjust the canvas size without knowing the exact dimensions you need, you can use the GIMP's "Fit Canvas to Layers" option in the Image menu and GIMP will automatically calculate the new canvas size for you.
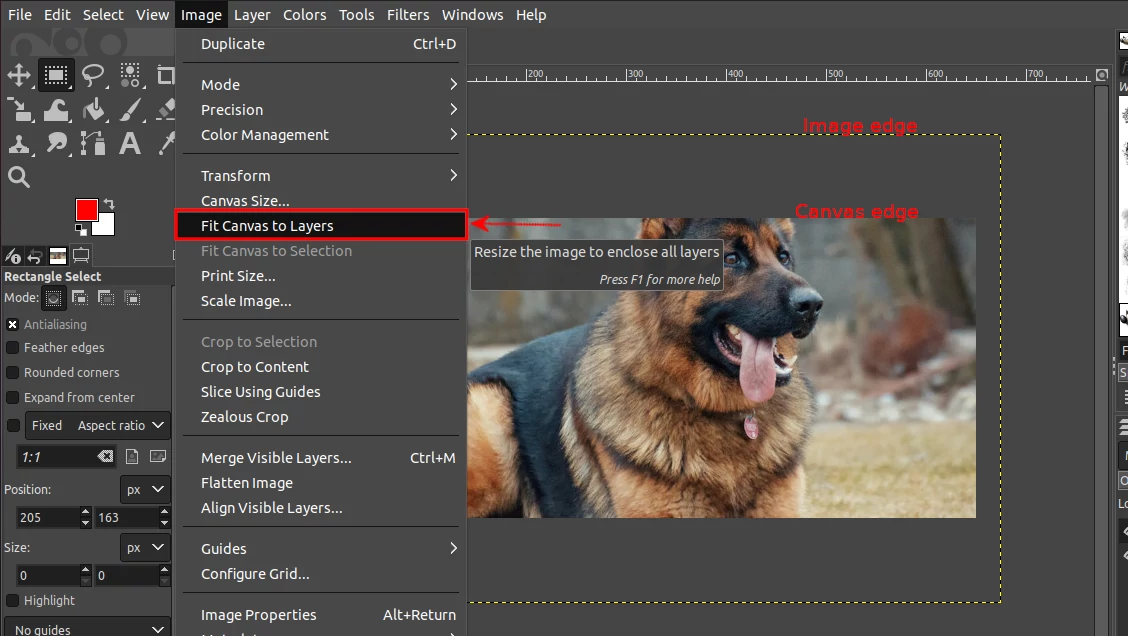
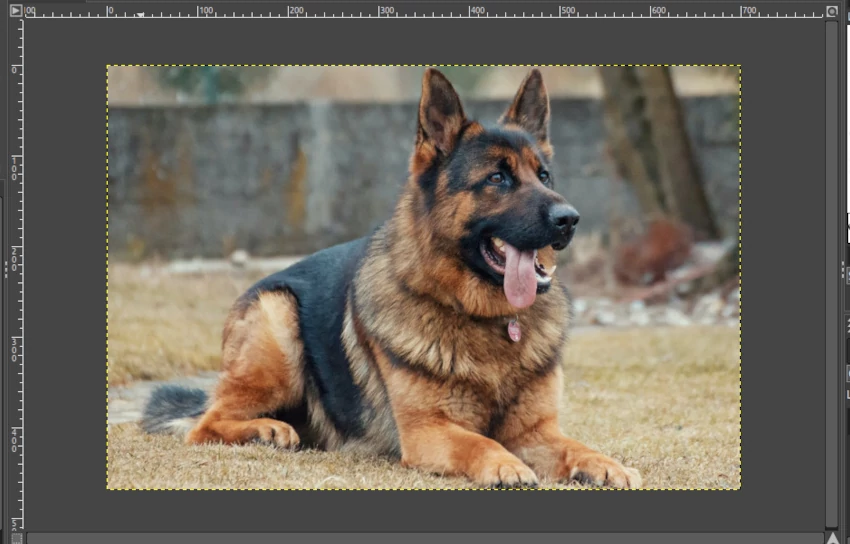
In the image above, you can see that the image is larger than the canvas size. The canvas occupies only the visible part of the image. The actual size of the image is denoted with the dashed border. Using the Image "Fit Canvas to Layers" option automatically increases the canvas size to be equal to that of the image layer as shown below.
You can also use the Image menu "Fit Canvas to Selection" option to resize the canvas and crop an image instead of using the crop tool.
Simply select the image area you want to retain, then open the Image menu and click on the Fit Canvas to Selection option.
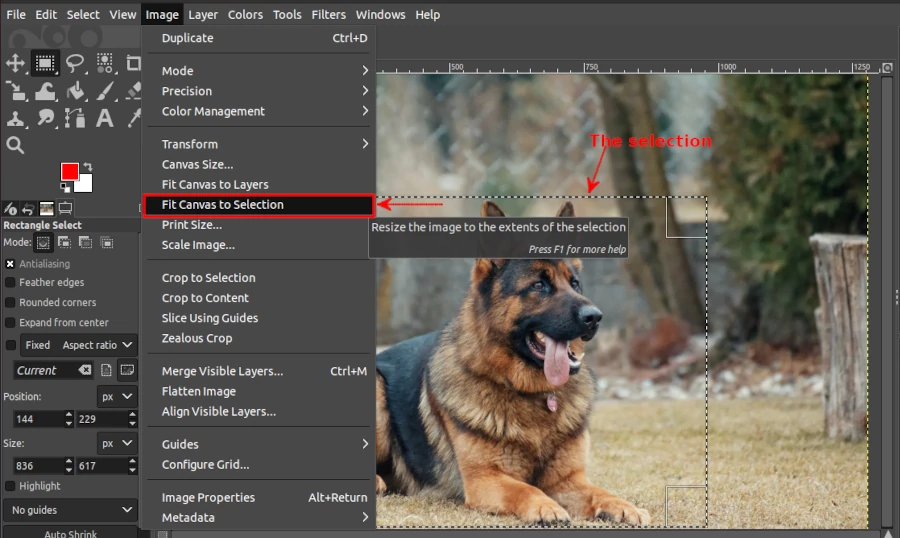
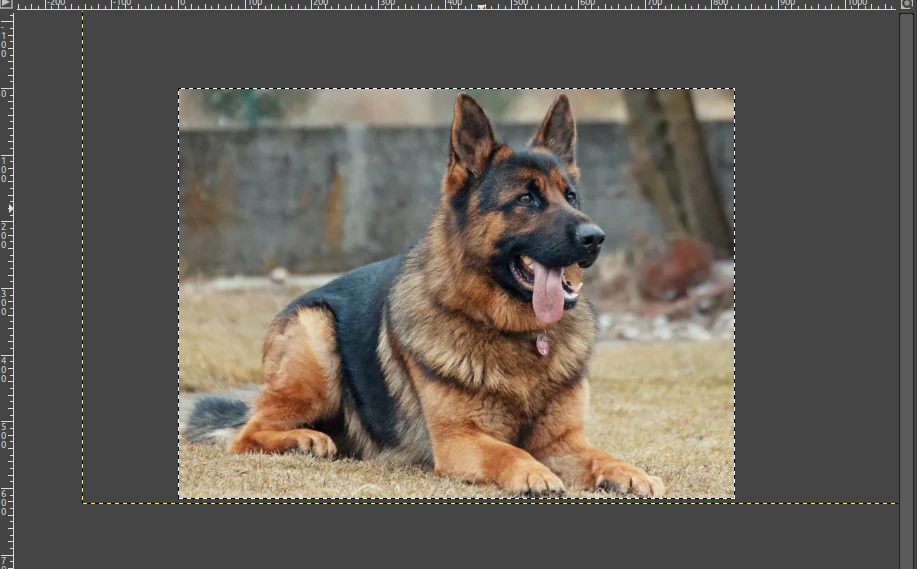
The canvas will be resized and the image will be cropped along the selection.
That's it.
Now you know how to resize the image canvas in GIMP.

