How to install Cisco Packet Tracer on Ubuntu
In this article, you will learn how to install Cisco Packet Tracer on your PC on Ubuntu Linux.
Packet Tracer is a cross-platform visual simulation tool designed by Cisco Systems that allows users to create network topologies and imitate modern computer networks.
It allows users to simulate the configuration of Cisco routers and switches using a simulated command line interface.
It is available for Linux, Windows, and macOS. In this article, I will be installing it on Ubuntu 22.04 though the process is the same for other Ubuntu versions.
Installing Packet Tracer on Ubuntu
Follow the steps below:
Step 1: Create a NetCad account at Cisco Network Academy and then log in to it.
Step 2: Open the Resources menu and then click on the Download Packet Tracer in the dropdown menu.

Step 3: Scroll down to the Download section and click on the Download link under the Ubuntu Desktop Version 8.2.0 English. At the time of downloading, v8.2.0 is the latest version.
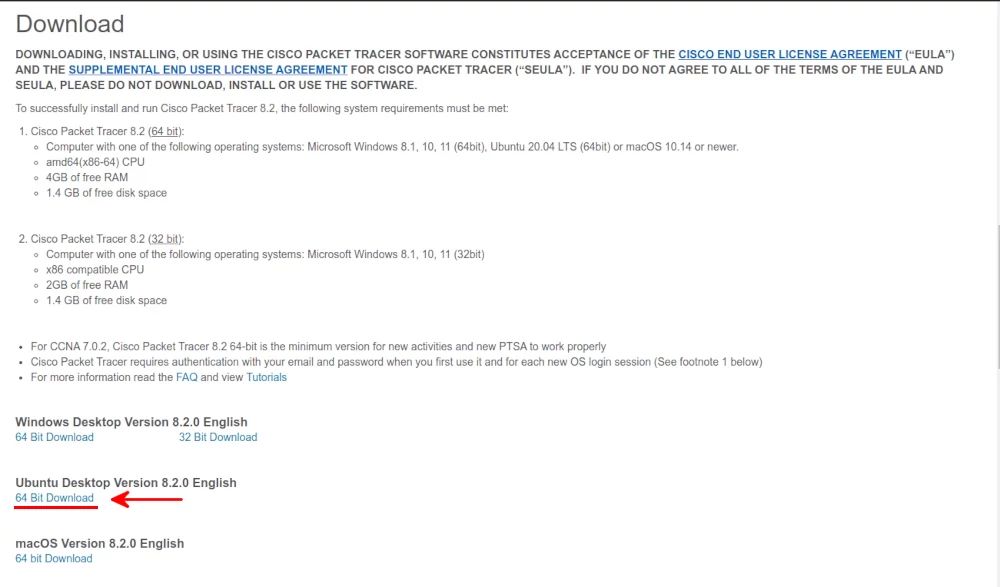
The download will start. Some browsers may prompt you before the download starts, in such case make sure the "Save File" option is selected then click on the "OK" button. The download may take some time depending on your internet speed.
Step 4: Once the download is complete, open the Downloads folder (or wherever you chose the file to download), find the downloaded Packet Tracer ".deb" file, and copy its name. To do so, simply click on it then press F2 and highlight (Ctrl+A) its name and extension then copy it (Ctrl+C).
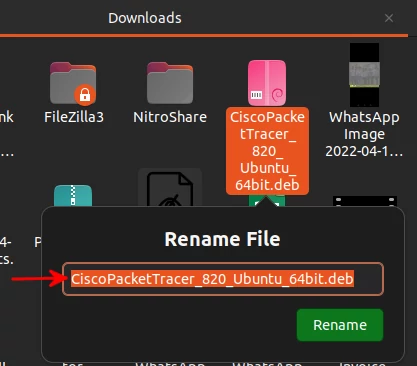
Step 5: Open the terminal (Ctrl+Alt+T) and change the directory to the Downloads folder (or the folder where the file was downloaded).
cd Downloads
Step 6: Run the command below to install Packet Tracer.
sudo dpkg -i filename.deb
Note: Remember to replace "filename.deb" in the command above with the actual file name that you copied. Enter your password when prompted to continue.
The installation will begin.

In case you experience an error during installation, run the command below and repeat the step above.
sudo apt --fix-broken install
Step 7: Press the Enter key to accept the Software License Agreement.
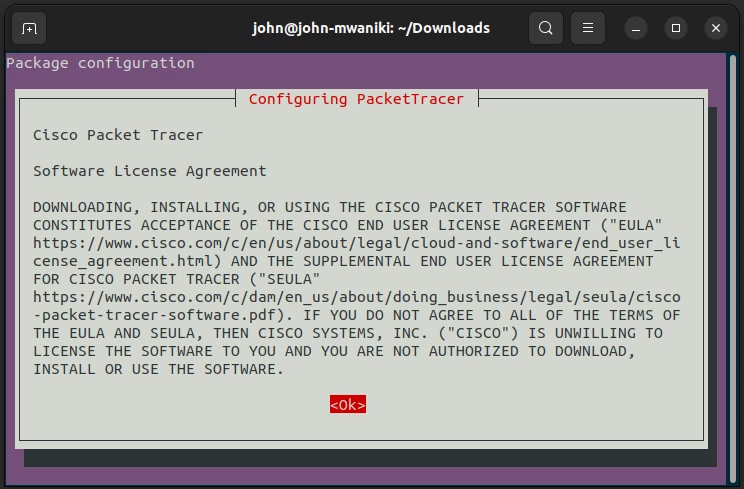
Step 8: Select <Yes> by pressing the left arrow key (<) on the keyboard and then press the Enter key to accept the terms of EULA (End User License Agreement).
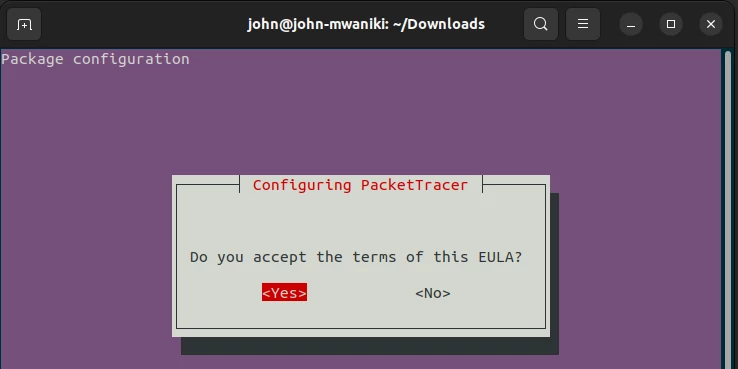
Now, wait for the installation to complete. This may take some time.
You may find some dependency problems that prevent the configuration of the packet tracer.
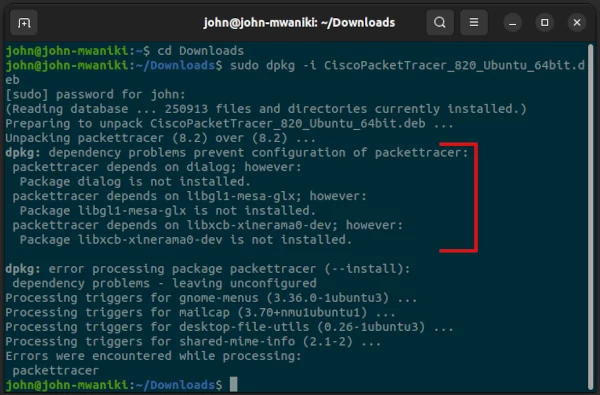
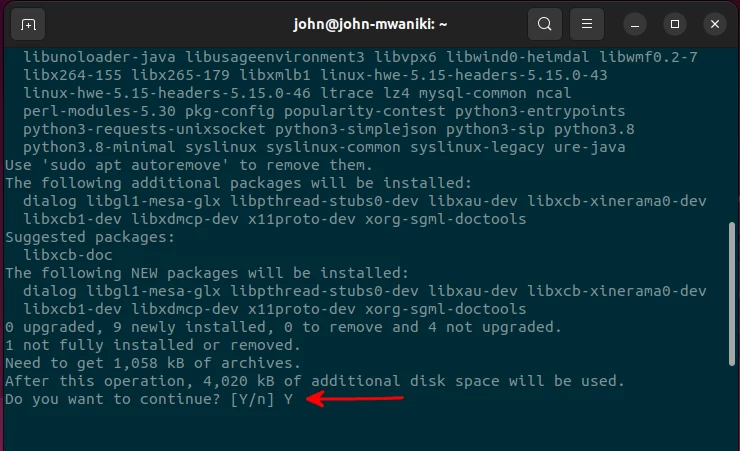
To install these dependency packages run the command below:
sudo apt install -f
When prompted whether you want to continue, enter Y then press the Enter key to continue.
Launching Packet Tracer
To launch Packet Tracer on your PC, simply open the terminal (Ctrl+Alt+T) and run the command below.
packettracer
Alternatively, you can search for it in the Applications menu and click on its icon.

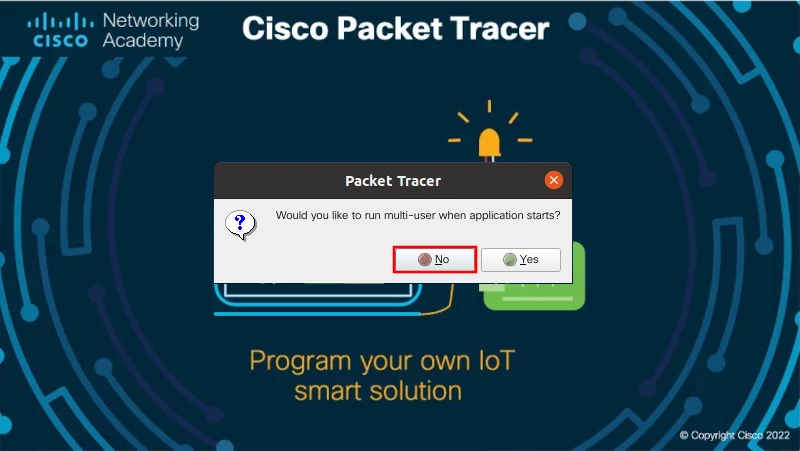
When you start Packet Tracer for the first time, you will be prompted to choose the mode in which it should start. The multi-user mode allows multiple users to work simultaneously. Click on the No button if you don't want to share your packet tracer instance or else select Yes.
You will be required to log into your CISCO account (when launching for the first time) to start using Packet Tracer. Click on the Networking Academy option.
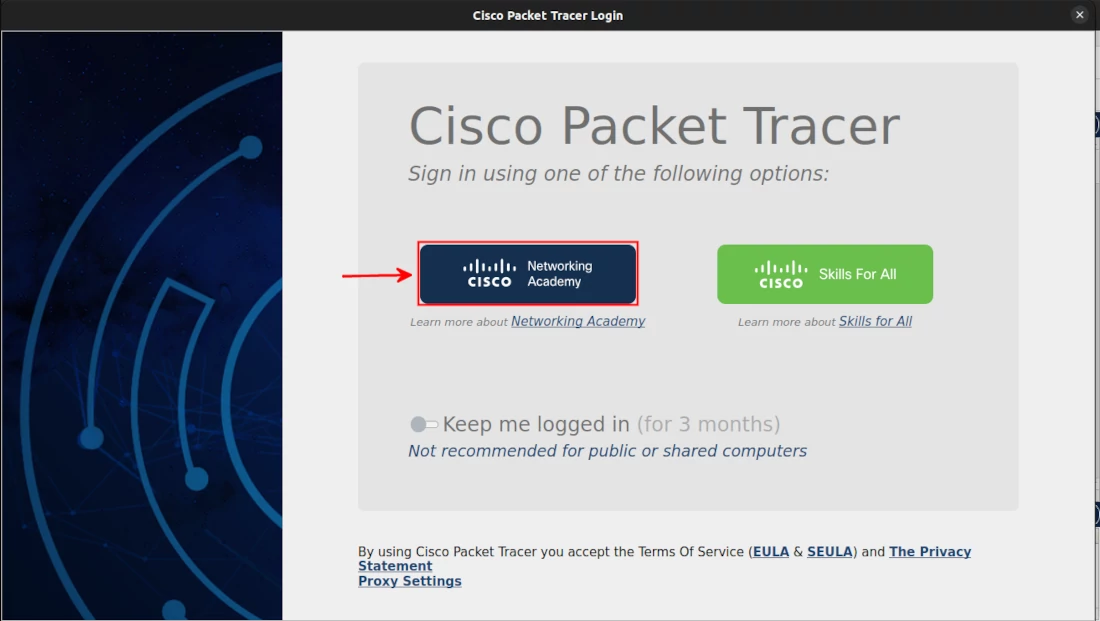
Enter your email address and password in the subsequent screens to log in.
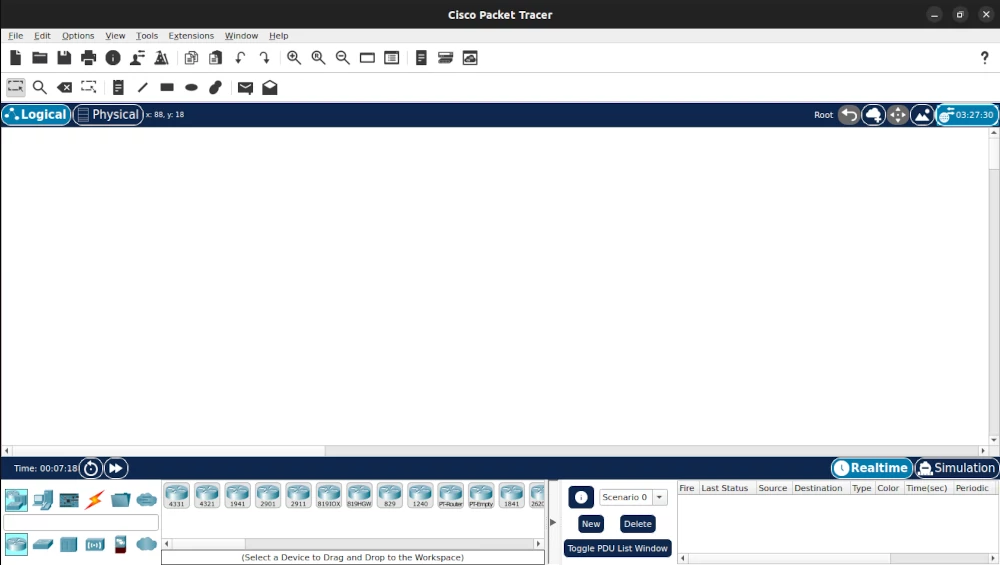
Once logged in, you will see the default window and can now start working on your projects.
That's all for this article.
Now you know how to download and install Cisco Packet Tracer on your Ubuntu Linux PC. Now you can start designing, creating, and testing small to complex network topologies that imitate modern computer networks on your PC.

