How to block specific websites on Tenda F3 router
Do you often find yourself spending too much time on social media that you can hardly concentrate on your work and get something done?
Or are your kids spending countless hours binge-watching videos online when they are supposed to be doing their school homework or performing other tasks?
You may consider blocking social media sites/apps and other websites that act as a distraction, taking much of your time during work hours.
Besides improving your productivity in your work, being able to block websites comes in handy in ensuring your children's safety online.
With all kinds of content being freely and easily available online, your kids may get access to websites with adult content, malware, or other sorts of content that you may consider risky.
If you know or are suspecting that your kids are accessing some websites they are not supposed to, or are spending excessive time on some websites, you may need to note them down and block them.
There are different ways in which you can block websites. You can install apps on the devices to block specific websites, adjust settings on the devices, or block websites at the home/office internet network level via the router settings.
In this article, you will learn how to block some specific websites on an entire network or on particular devices permanently or for a specific duration via the Tenda F3 router admin web interface.
Blocking specific websites via Tenda F3 router
Follow the steps below:
Step 1: Connect your PC to the home/office network.
Step 2: Open a web browser and enter the address tendawifi.com or IP address 192.68.0.1 in the address bar and press Enter key.
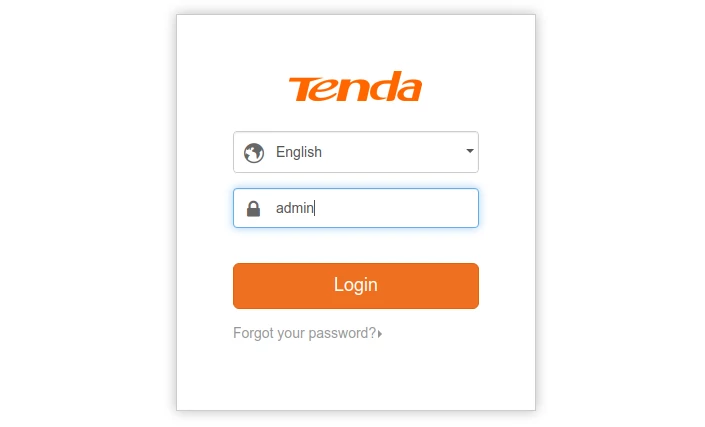
Step 3: In the login page that opens, enter the password as admin, or whichever password you set if have ever changed it before. Then click on the Login button.
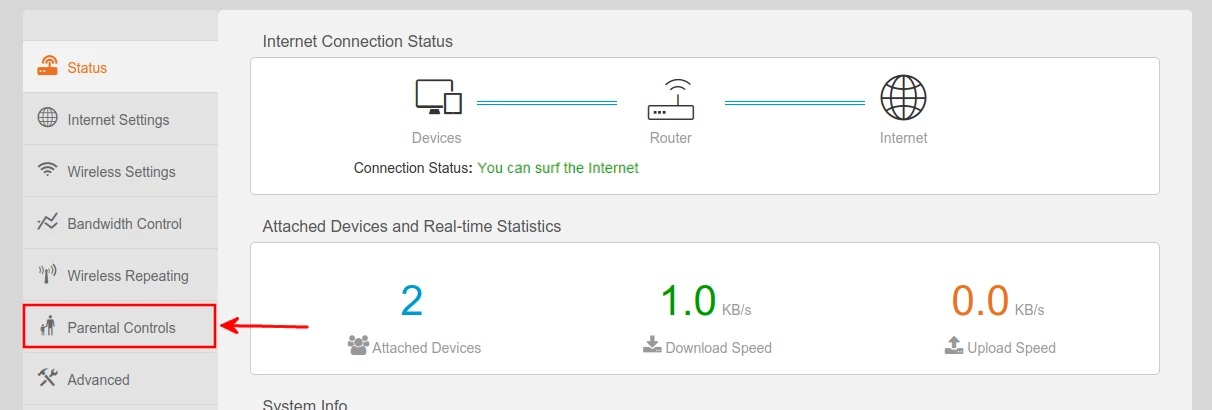
Step 4: You will be redirected to the Status page of the web interface. Click on the Parental Controls in the left menu.
Step 5: The Parental Controls page is divided into two sections:
- Attached Devices - This section contains a list of all the connected devices to the network and their details such as IP address and duration they have been connected.
- Access Restrictions - This is the section in which you will be able to do the restrictions (block the websites).
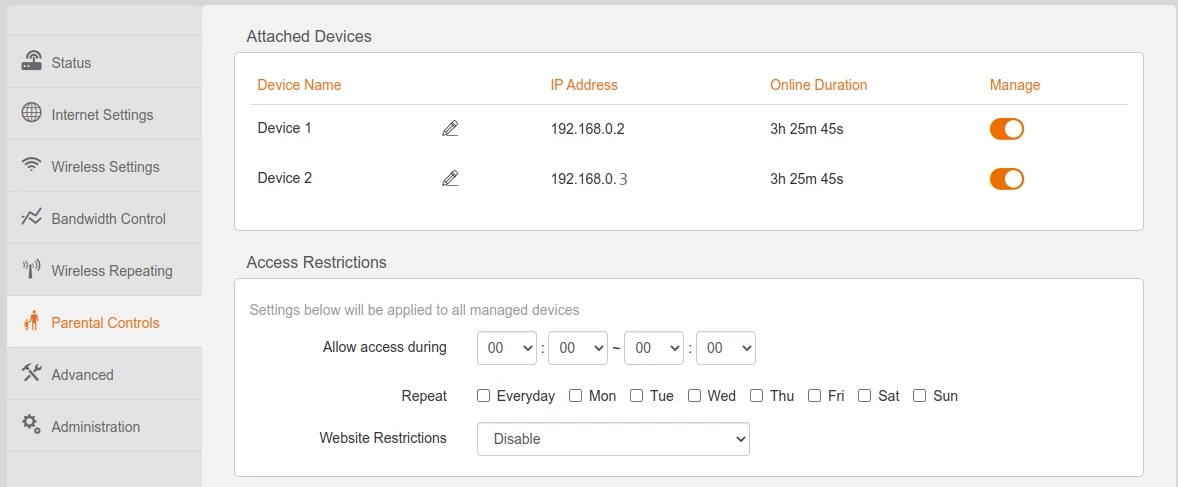
By default, the restrictions will apply across all the devices connected to the network. If you want them to only apply on specific devices, switch off the toggle buttons for the devices that you don't want the blocking to apply in the Attached Devices section under the Manage column.

Under the Access Restrictions section, configure time schedule in a day in the "Allow access during" field, and the days of the week it should apply in the "Repeat" field. The time is selectable from a dropdown in 24hr system format.

Then configure the websites restrictions by selecting an option from the dropdown:
- Disable - The managed device(s) (ie those switched on in the "Manage" column of Attached Devices) will not be able to access the internet unless the current time falls within the duration of the schedule.
- Only Permit - The managed device(s) can only access the website(s) you permit unless the current time falls within the duration of the schedule.
- Only Forbid - The managed device(s) will not be able to access the website(s) you forbid unless the current time falls within the duration of the schedule.

On selecting either of the "Only Permit" or "Only Forbid" options, an extra input field labeled Websites Specified will appear.
Enter the website domain name without including the "www" or "https" part. For example, if blocking this website, write "solvetechnow.com" instead of "www.solvetechnow.com" or "https://www.solvetechnow.com".
If you want to block several websites, then click on the "+ Add" button to have more input boxes and enter their domain names in the same format.
Then click on the OK button at the bottom right to apply the changes.
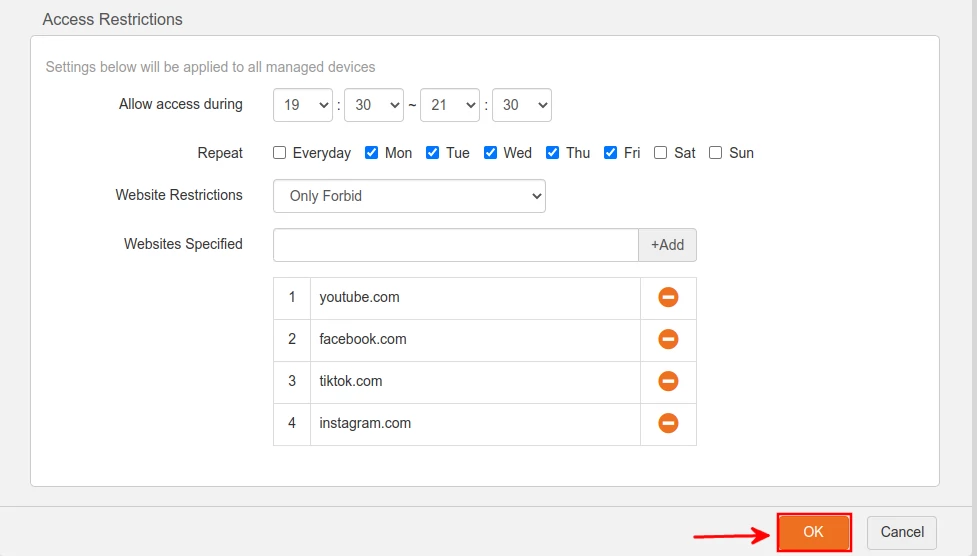
In the above configuration, the managed devices will only be able to access the four social media networks between 7:30 PM and 9:30 PM from Mon-Fri. You can configure it however you want.
That's it!
With the above steps completed, access to the internet or to specified websites by specific or all device(s) will be restricted to follow the configured schedule.
If at any given time you want to remove a device from the schedule, just switch off its toggle button under the "Manage" column in the "Attached Devices" section and click on the OK button to apply the changes.

