How to change account name, picture & password on Windows 10
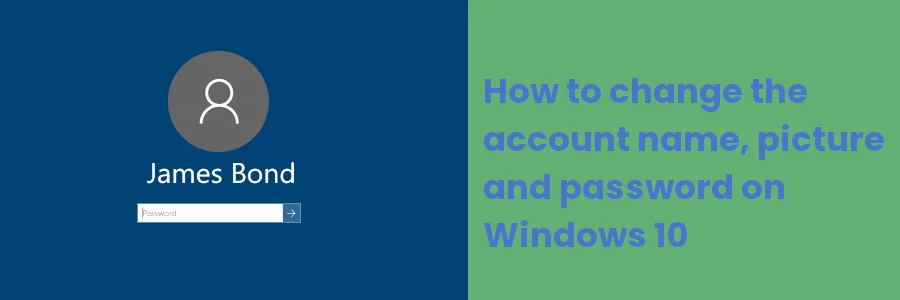
When starting your PC with a Windows operating system, you are presented with a login screen with your Windows account name, a profile picture, and a textbox to enter your password.
For some reason, you may feel uncomfortable with these details. This may be because your Windows account login still has a generic default profile picture (a silhouette of a person). Also, if you didn't set up the account yourself, there are chances that the account name and picture do not really portray the real you. Another person could have previously used the PC before handing it over to you and it still has their name and picture on it. Or the PC could be lacking a password and you want to enforce more security by adding it.
For whichever of the above reasons (or any other), you may want to change these details. Luckily, it is quite easy to do it all by yourself.
In this article, you will learn how to change the Windows account name, profile picture, and password. I will be using Windows 10 for demonstration, which is quite a similar process to other Windows versions.
Follow these quick steps below:
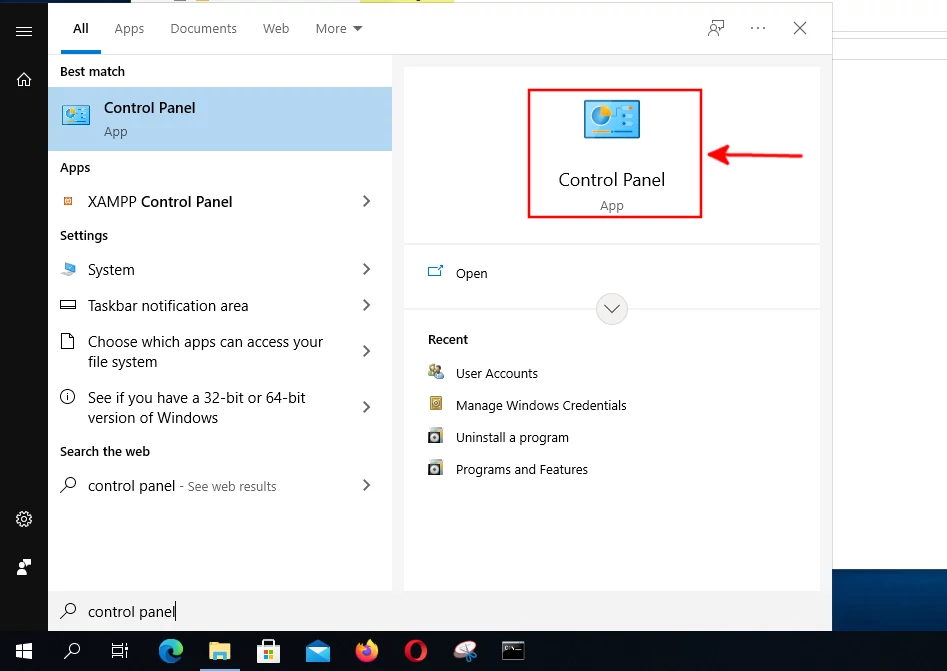
Step 1: Open the Control Panel. To do so, press on the Windows key and then type the term "control panel".
Step 2: Click on the "User Accounts" option.
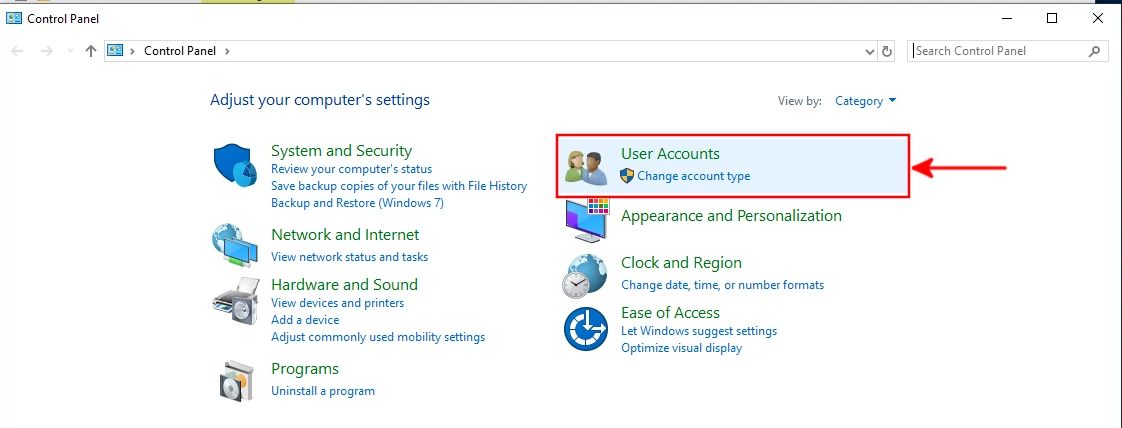
Step 3: Click on the "User Accounts" option again.

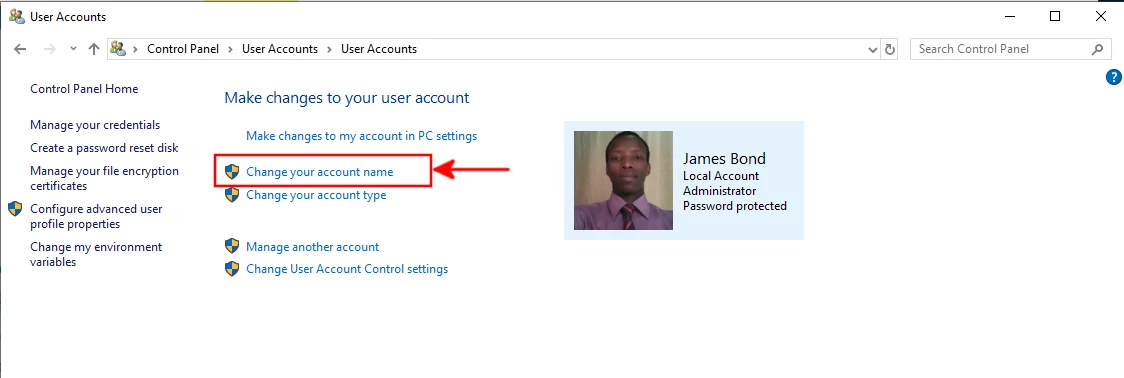
You will see the current account details such as the account name, profile picture, the account type, and whether it is password protected or not.
Step 4: Click on the "Change your account name" option.
Step 5: Write your preferred new name (that you would want to appear on the login screen) and click on the "Change Name" button to save it.

Step 6: You will now see the newly updated name. To set a new picture and password, you will need to use the Windows setting app. To open it, click on the "Make changes to my account in PC settings" option.

It will open on the "Accounts > Your info" screen as shown below. Alternatively, you can open this directly by opening the start menu and clicking on the "Accounts" section which will take you to the "Your info" page
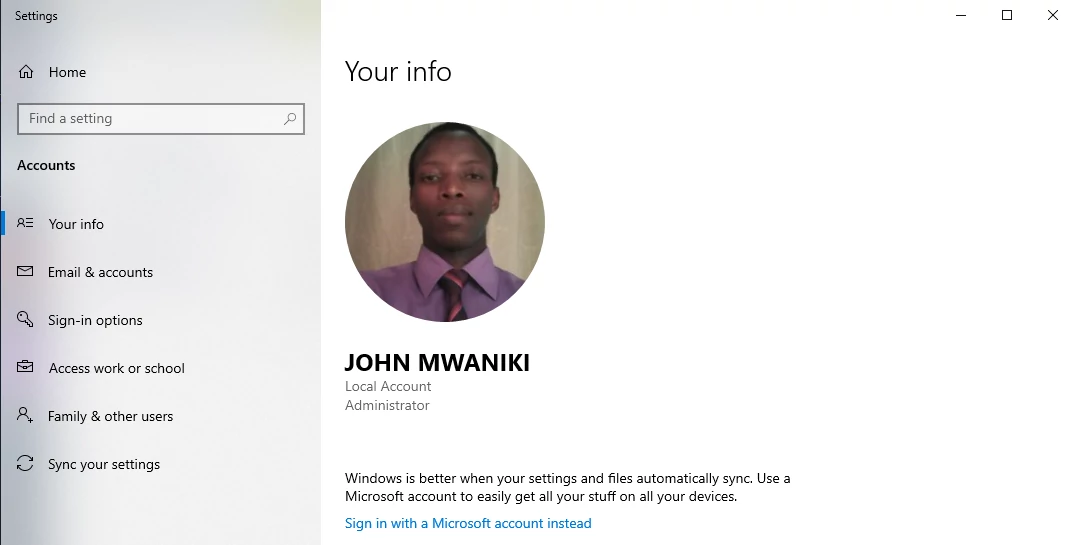
Step 7: To update your account picture, scroll down to the "Create your picture" section and click on the "Browse for one" option. It will allow you to choose an image from your computer storage. Once you locate your preferred image, click on it and then on the "Choose picture" button. Windows will instantly update it on your user account.

Alternatively, you can click on the camera option to take a direct picture of yourself using your PC's webcam.
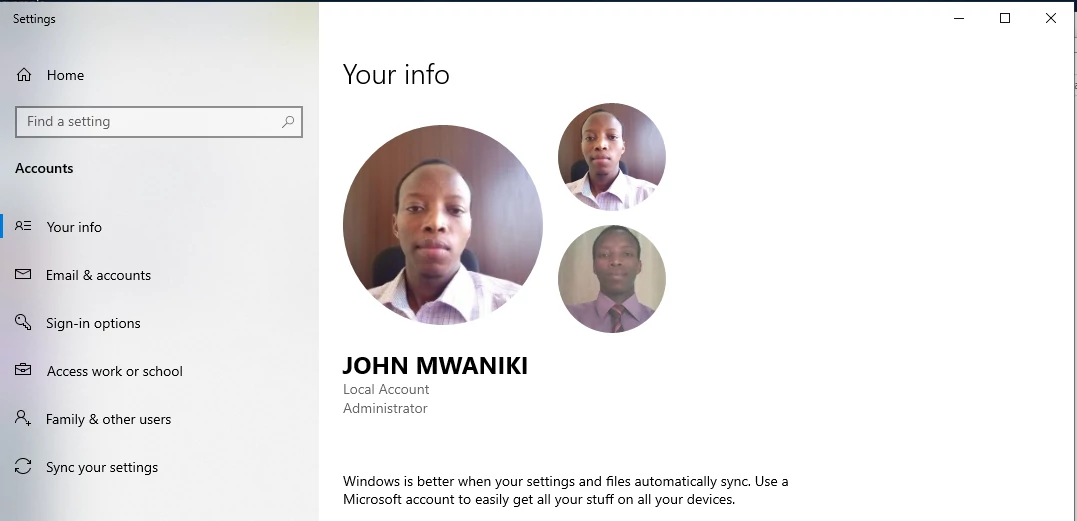
If you have ever changed the account picture before, or now you have changed it more than once, Windows will remember the last three pictures you’ve used. You can easily switch between the 3 by clicking on any of them to set it as the current account picture.
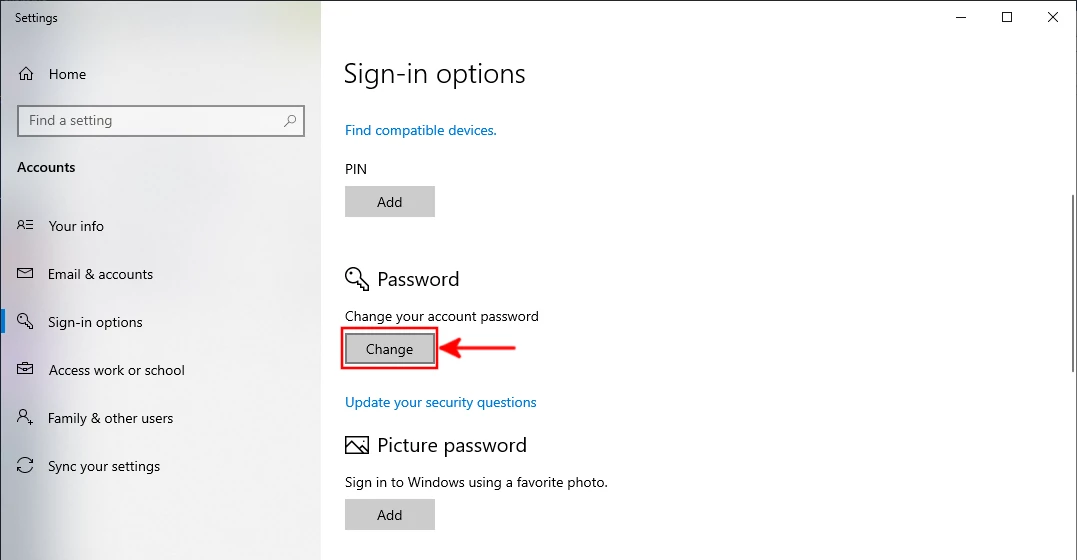
Step 8: To change your Windows account login password, open the "Sign-in options" page and then click on the "Change" button under the "Password" section.
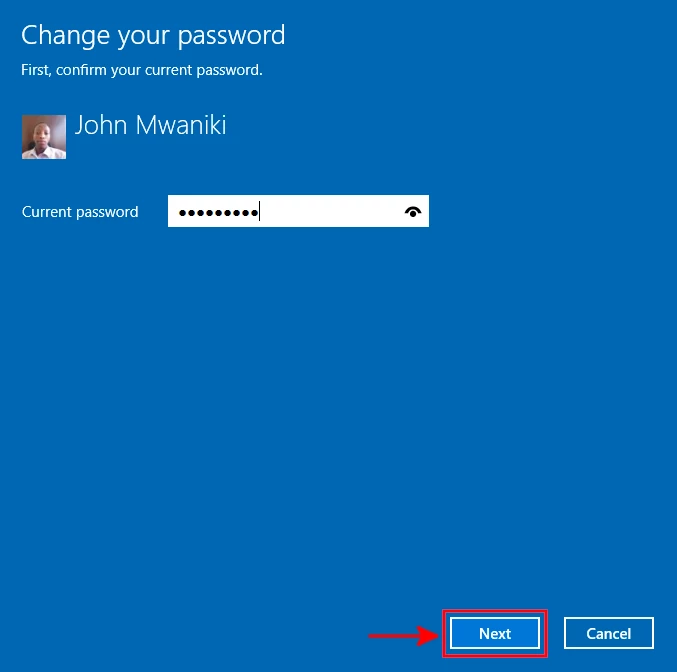
Step 9: Write your current password and then click on the "Next" button to proceed.
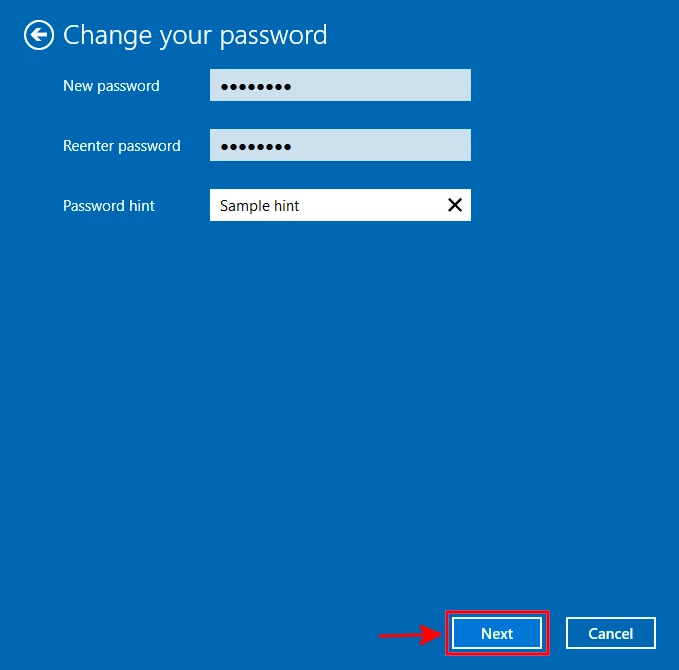
Step 10: Write a new strong password and repeat it. It's advisable to use a combination of uppercase and lowercase letters, digits, and special characters.
Then write a password hint. This is a word or phrase that in some way relates to the password such that it can help you remember the password in case you forget it. It should not be so direct such that another person can use it to guess your password.
Then click on the "Next" button to proceed.
Step 11: Click on the "Finish" button to complete and save the changes.
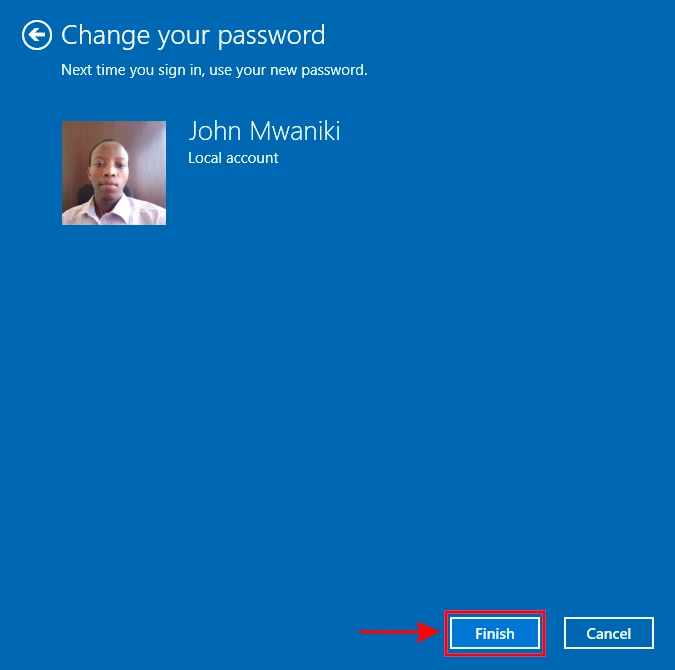
You will be required to use the new password onwards from your next log-in.
That's it!
You can now comfortably change your Windows account name, picture, and password all by yourself. It's my hope that you enjoyed this article and found it helpful.

