Step-by-step guide on how to create & set up a Facebook page
With roughly 2.89 billion monthly active users as of Nov 1, 2021, Facebook is definitely one of the best platforms for promoting your business online.
When establishing your brand on Facebook, the first step should be to create a page for it.
Advantages of Facebook page
Below are some of the ways you can benefit from having a Facebook page for your business:
- Connecting and engaging with existing and potential customers - Through posts, comments, and private messages via the Facebook page, business owners can communicate and engage with customers.
- Sharing business information - On the Facebook page, you can share basic business information such as business name, description, list of services or products, and contact details.
- Showcasing your products and services - You can do this by posting details about your products and services on the page.
- Driving traffic to website - With links to your website on the page profile and within the posts, a good number of people are likely to click on them and visit your website.
- Helps in targeted advertising - Facebook advertising allows you to target specific demographics, based on location, age, gender, and interests, or people who have been to your website or their look-alike audience.
- Getting business insights - Facebook page gives some cool metrics through "Facebook Insights" that can help you monitor things such as page views, page likes, and post-views among others. This helps you to know what kind of content performs the best and plan for the future.
How to create a Facebook page
Below is the step-by-step procedure on how to create a Facebook page on the desktop version.
Step 1: Log in to your Facebook account.
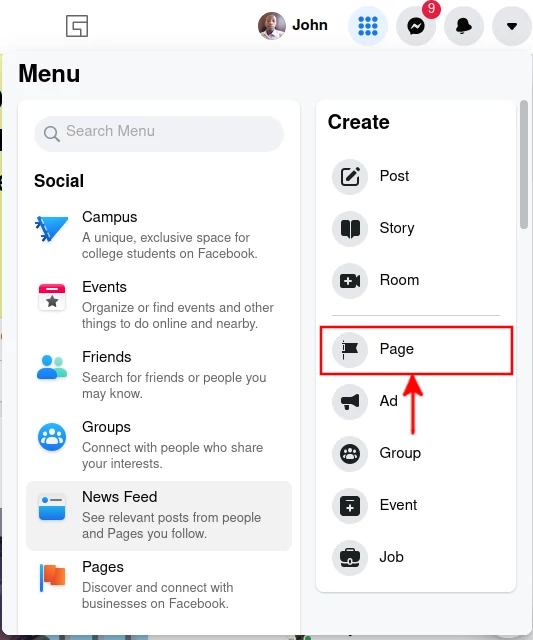
Step 2: Click on the menu icon (dotted icon) at the top right corner of the screen.
Step 3: Click on the "Page" option from the drop-down that appears.
Step 4: Fill in the page information
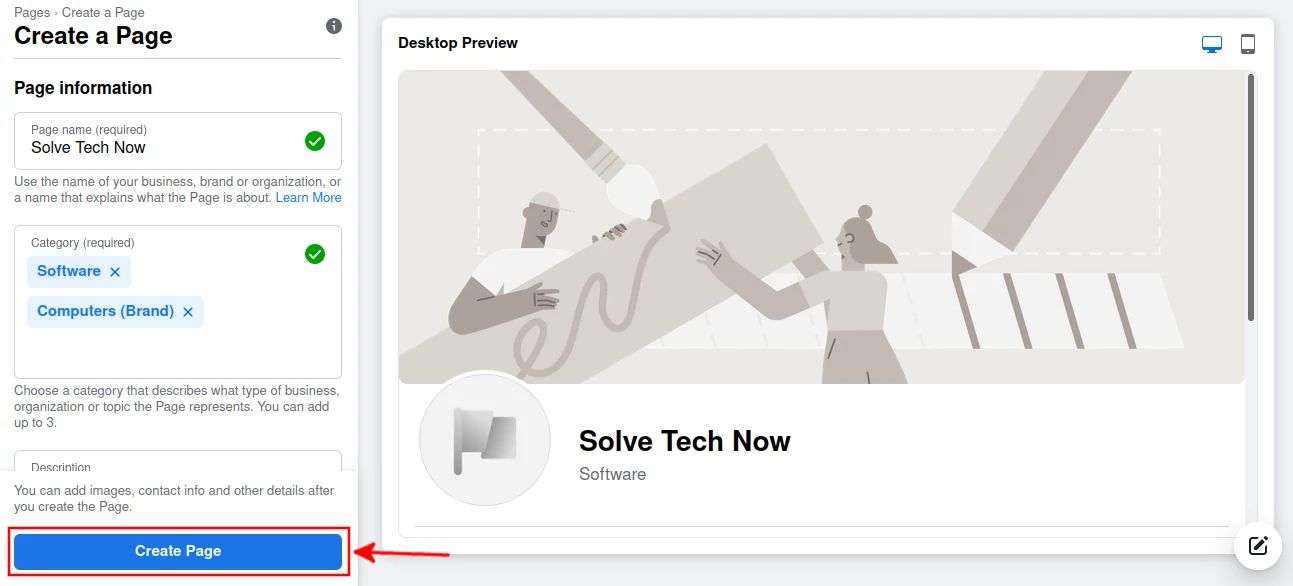
In the "Page Name" field, enter the business name, or the name of the organization.
In the categories field, Facebook allows you to add up to 3 categories that best describe what the business or page is about.
Add a brief description of up to 255 characters long that describes what the page is all about in the description field then click on the "Create Page" button.
Step 5: Select from your device storage the images for the profile picture and the page cover photo.
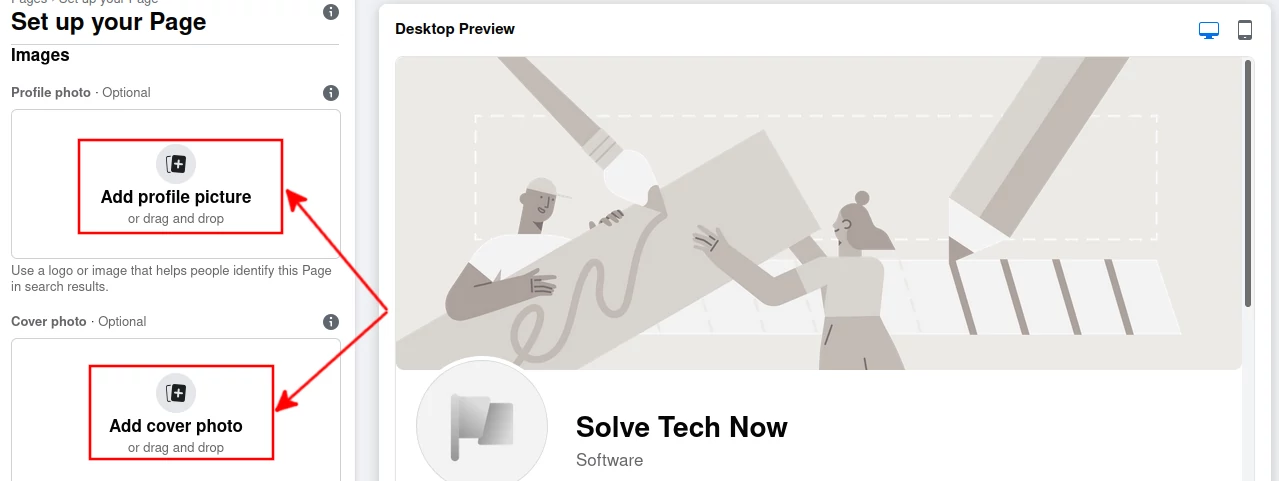
It is recommended that the profile picture be square in shape to avoid it being cropped and some portion of it hidden from view. I recommend an image not less than 200px by 200px profile picture and 850pixels by 315pixels for the cover photo.
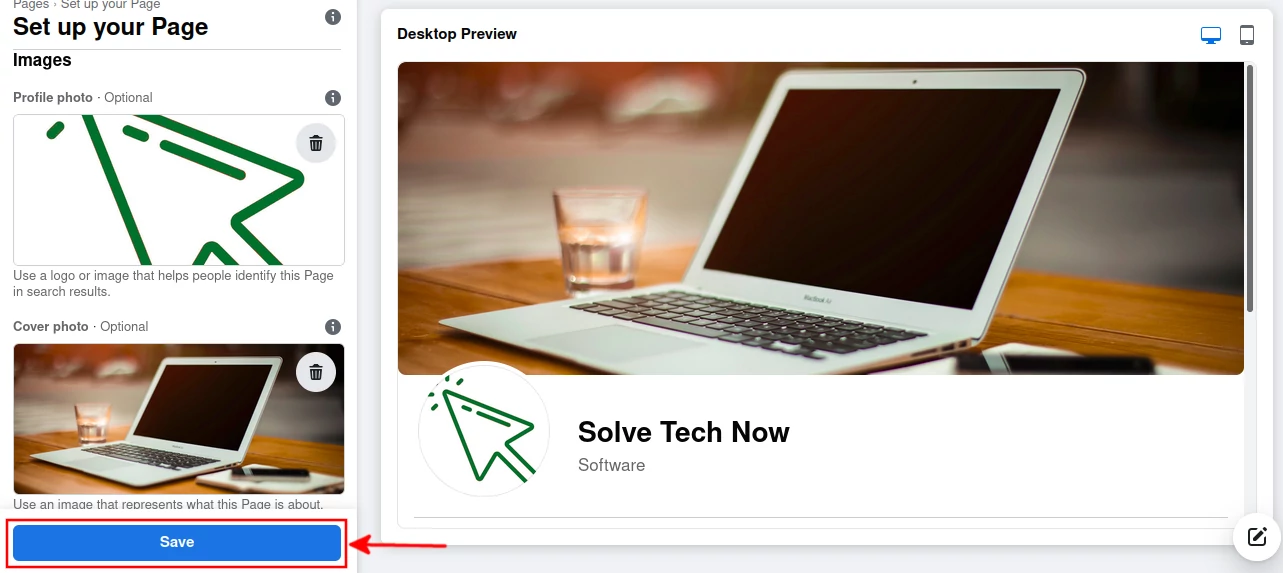
You will see a preview of your page as shown below.
Step 6: Click the "Save" button.
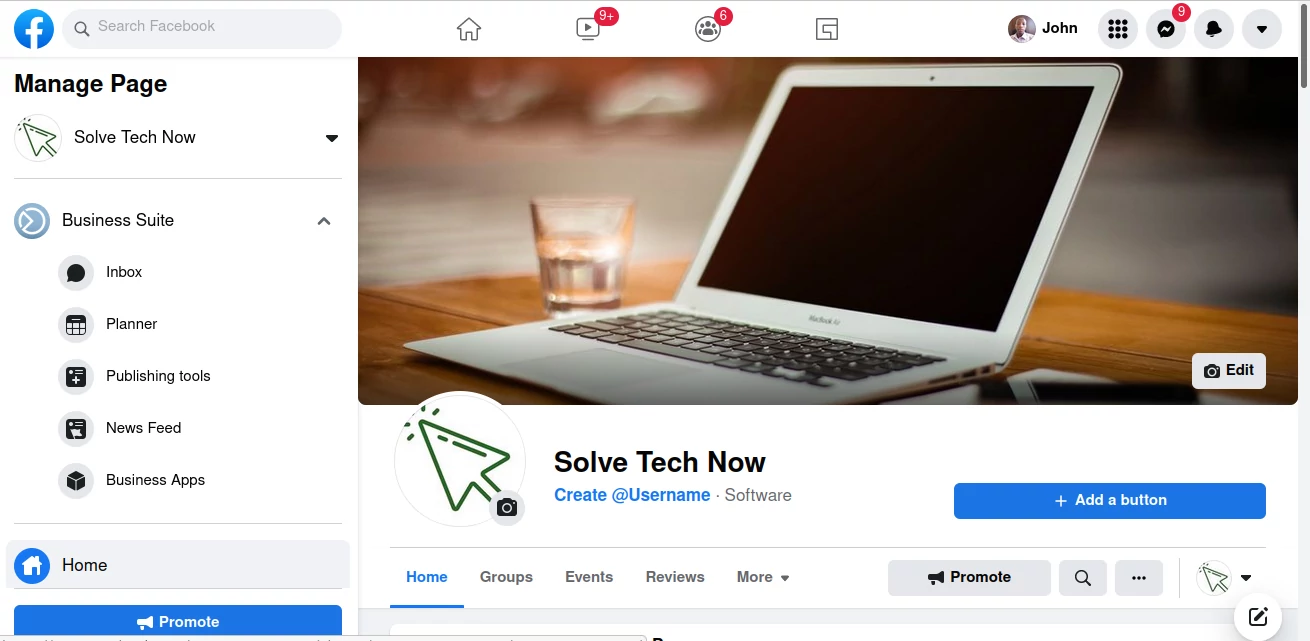
The page is now ready. You will be taken to the admin view of the page as shown below.
Creating a Username for the page
Below is what your page URL will look like by default after creating the page. This is the URL that you will be sharing with people across your networks or adding to your website in order to access your Facebook page.

But I think having the URL below is way cooler and easier to remember.
https://www.facebook.com/solvetechnow
To change it to the second option, all you need is to create a username for the page. The username basically becomes the last part of the page URL eg. solvetechnow.
To create a username for your page, Facebook has some regulations in which you must observe to be eligible as listed below:
- You must not have created more than one page lately.
- Your personal Facebook account needs to be verified.
- Your personal profile must not be newly created.
- For your personal Facebook account, a username must be defined
To create the page username, click on the "Create @Username" just below the page name.

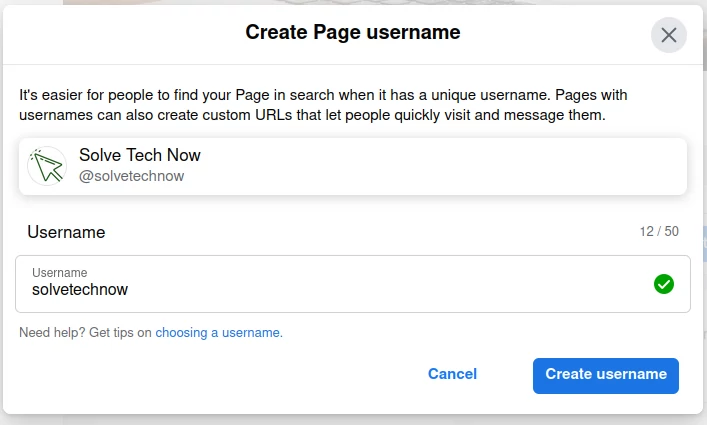
A popup modal window appears, enter your preferred username. Since the username should be unique, it will be rejected if you enter one that is already in use by someone else. Once you enter the one that is unique, you will see a green tick. Click on the "Create username" button to save it.
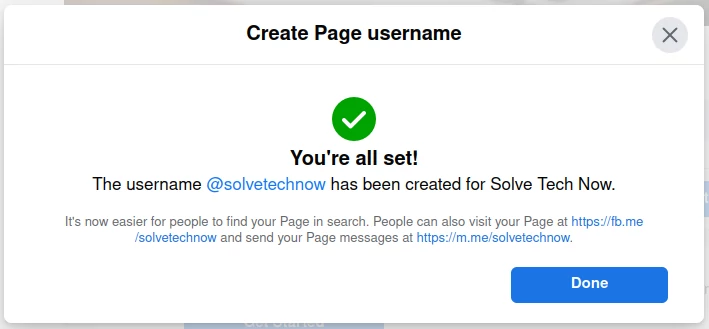
Once the username has been successfully created, you will see the popup modal window with the username information as shown below.
Adding a call to action button
A call-to-action button guides page viewers in performing the desired action. Click on the "+ Add a Button" to do this.

Select the most suitable option for you from the wide array of options provided. Some may require you to enter a website link, an email address, or a phone number.
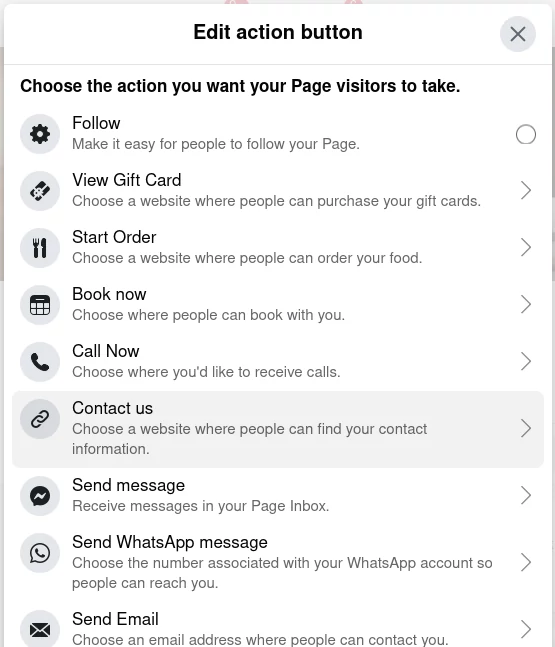
In my case, the most applicable option is "Learn more" as it directs people to visit this website.
I recommend that you add all the other necessary information about your business such as phone number, email address, website address, products you deal with, working hours, etc.
Viewing your Facebook page as a visitor/fan
To view your page just every other would, you need to switch from page to your personal account on "how to interact with the page".
Simply click on the dropdown select with the page logo at the right side below the call to action button. You will by default be interacting with the page as the page itself. Click on your personal account from the options in the dropdown.

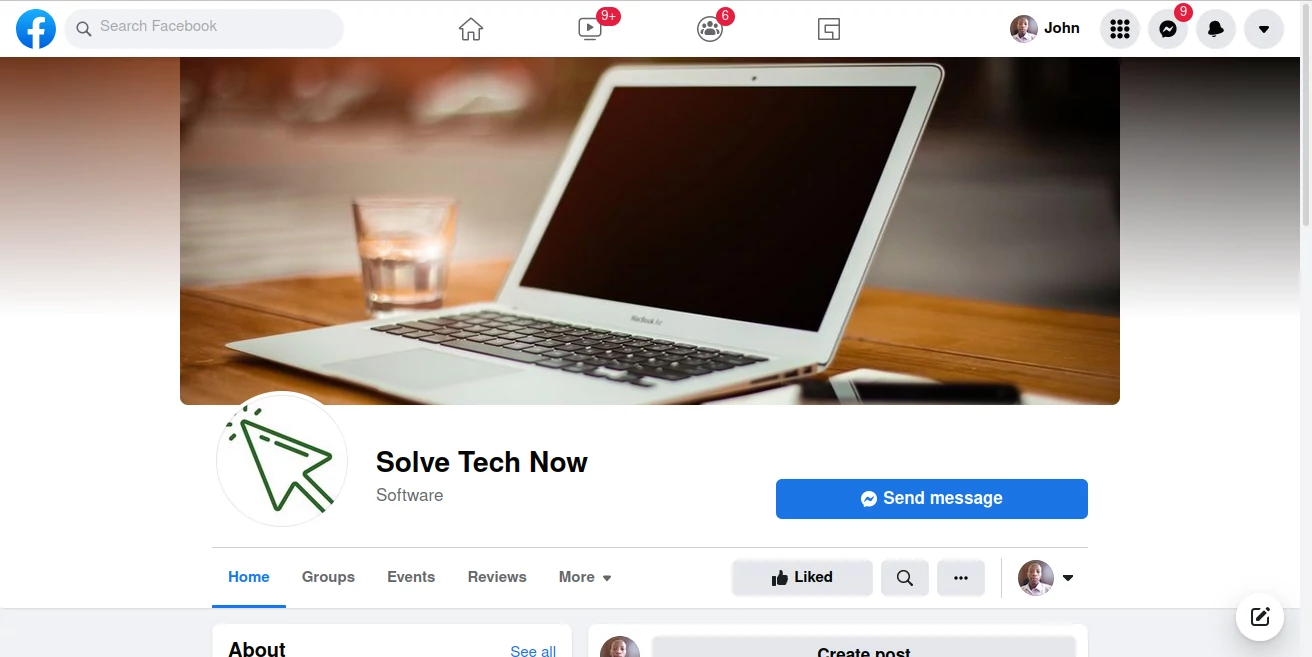
Now, this is what your page looks like to everyone else.
Posting on the Facebook page
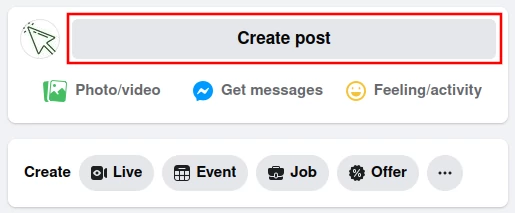
To create a post on the page, click on the "Create post" button.
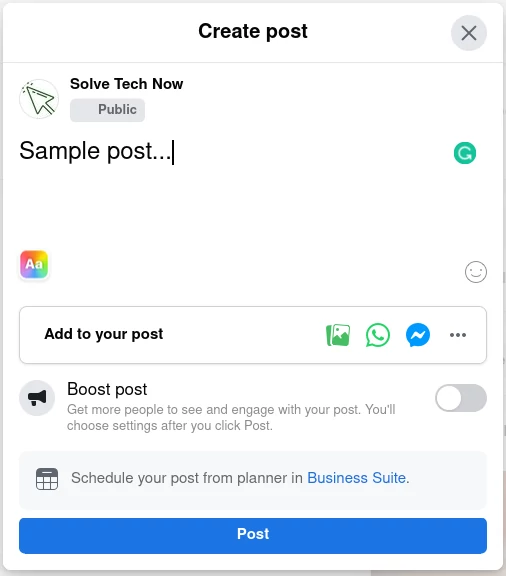
A popup modal window will appear, type your post content and/or click on the photo/video icon just below to add a video or image in the post. Click on the "Post" button to publish the post.
That's it!
You can now comfortably create and set up a Facebook page for your business.

