How to crop an image into a circle in GIMP
Cropping of images is a very important feature in GIMP and other image editing programs. It helps get rid of unwanted portions of an image to retain only the area you want to focus on.
The crop tool works by selecting the area that you want to retain where everything outside of that region gets cropped out.
Besides the basic cropping which results in square or rectangular images, you may want to have circular images like those shown below.

There is actually no circular cropping tool in GIMP and neither are these images circular. Images can only be either square or rectangular in shape.
The images that look circular are basically square or rectangular shaped with a circular area of view and a transparent background.
In this article, you will learn how to crop an image into a circular shape in GIMP.
Cropping an image to a circular shape in GIMP
Follow the steps below:
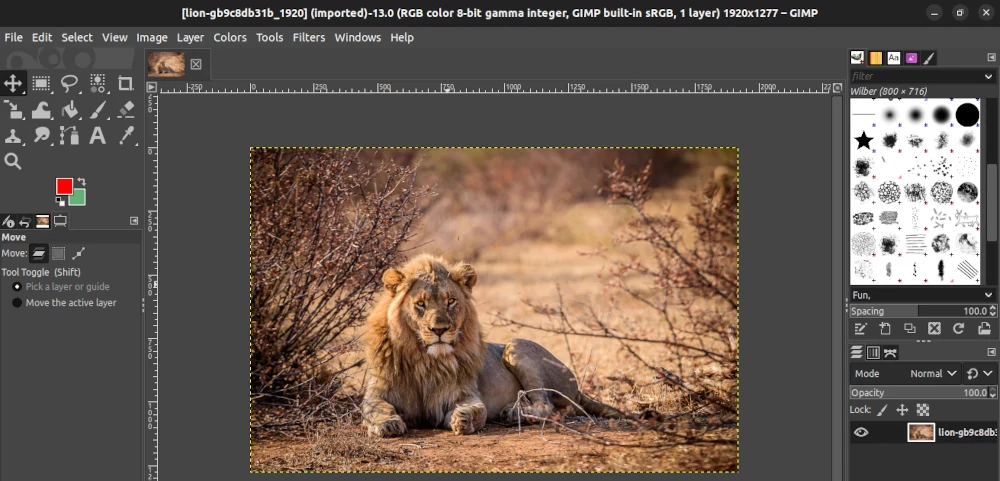
Step 1: Launch GIMP on your PC and open the image you need to crop.
Step 2: Add an alpha channel to the image. This is to allow you to erase the image background to be transparent. To do so, open the Layer menu, Transparency submenu, and then click on the Add Alpha Channel option.
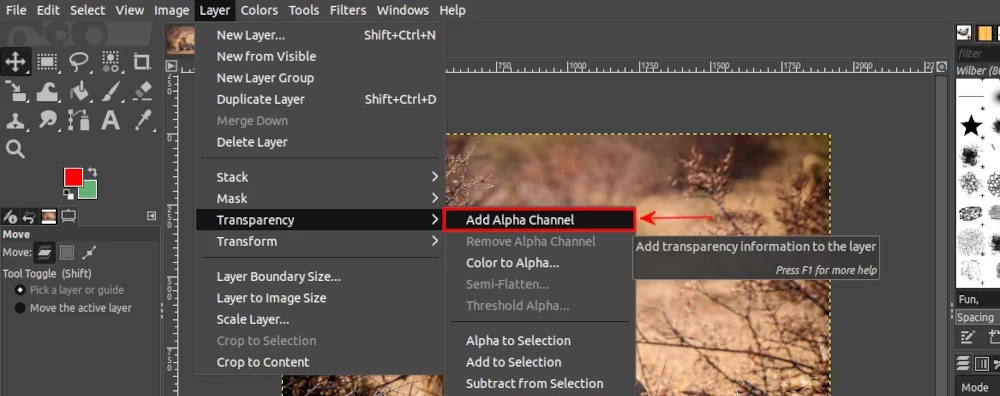
In case the Add Alpha Channel is grayed, it means the image has an alpha channel already so no action will be required.
Step 3: Right-click on the Rectangle Select tool in the toolbox and select the Ellipse Select. This will be used to make a circular selection on the image.

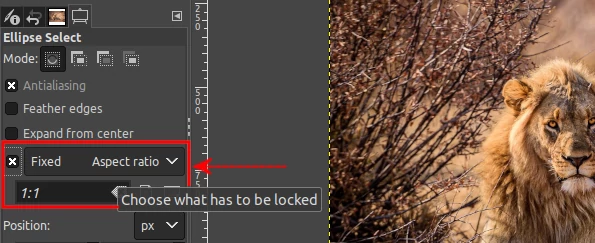
Step 4: Make sure the Fixed Aspect Ratio is selected in the Tool Options tab which is below the toolbox. Then check the box on the left. Also, make sure that the Aspect Ratio is set to 1:1. This will help to make the selection by the Ellipse select tool to be a perfect circle.
Step 5: Click somewhere on the image and drag the mouse to make a circular selection on the image. You can resize the selection by clicking inside the boxes at the corners or edges of the selection and then dragging the mouse inwards or outwards.
To reposition the selection, click anywhere inside the circle and drag it to the position you want.
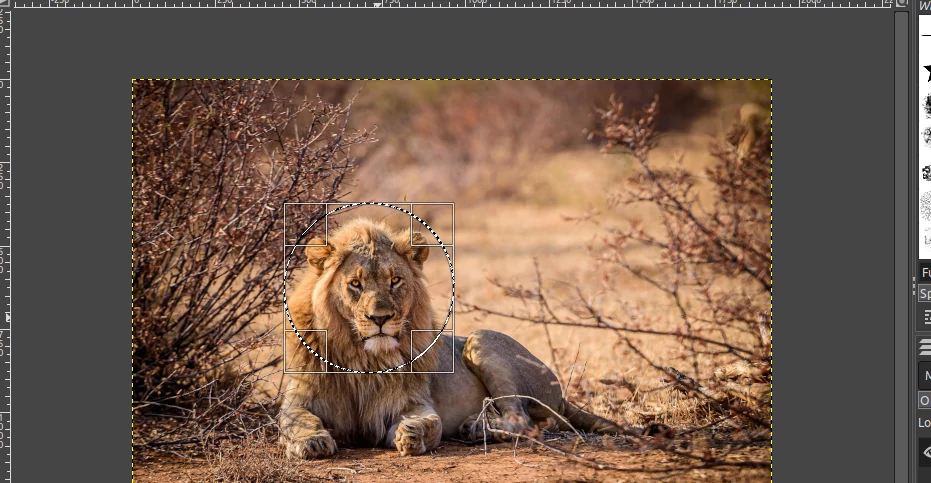
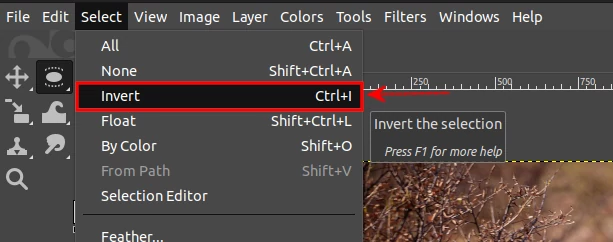
Step 6: Open the Select menu and click on the Invert option. This will invert the selection to make the image area outside of the selection you made be selected instead, and the selected area becomes unselected.
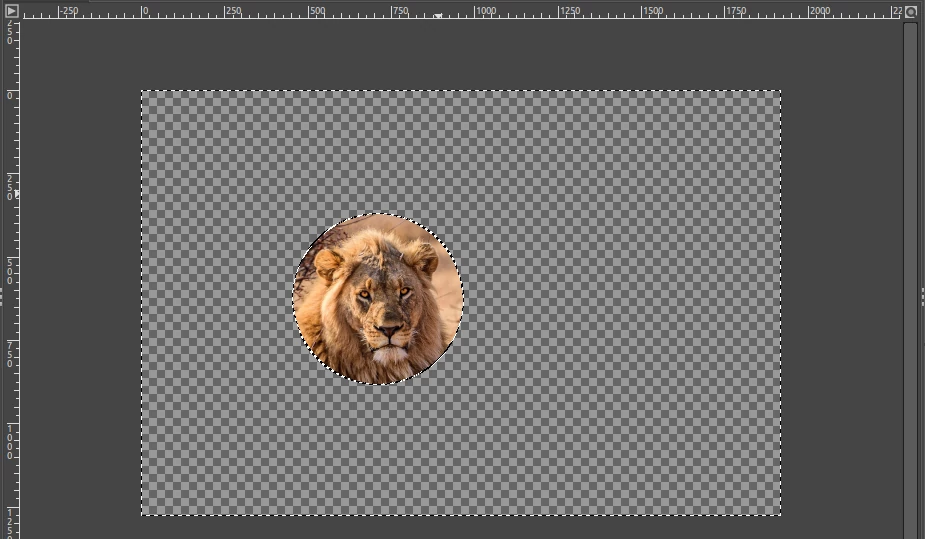
Step 7: Press the Delete keyboard key. This will erase all the selected areas in the image to transparency. Since we inverted the selection, the area outside our original selection gets deleted.
Step 8: To crop the image and get rid of all the unwanted transparent background areas, open the Image menu and click on the Crop to content option.
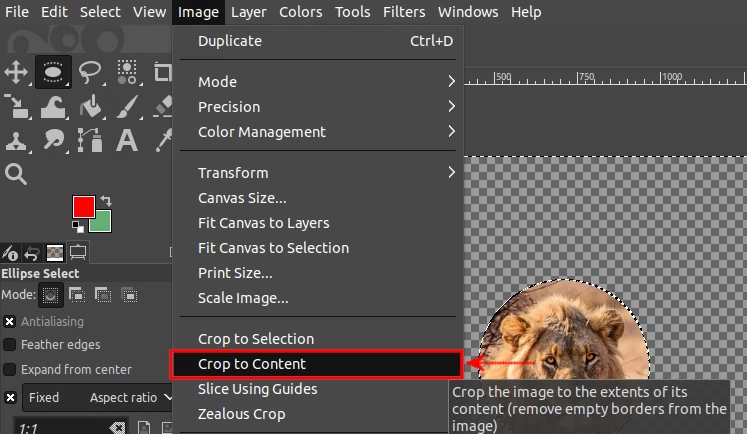
The image will automatically be cropped into a square with transparent edges around the circle.
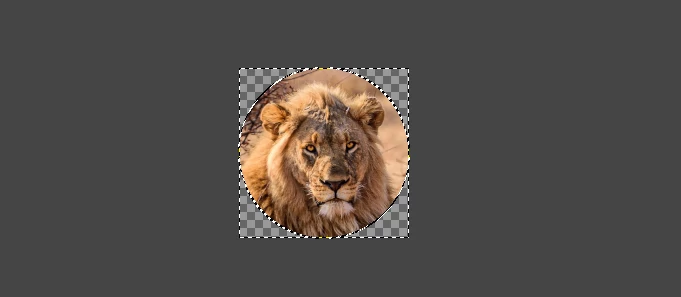
Step 9: Save the image in a format that supports transparent backgrounds, ie as .png or .webp. It's preferable to save it as a .png unless you want to use it on the web, in such case you can save it as .webp.
To save the image, export it by clicking on the Export As option of the File menu. Alternatively, use the Ctrl+Shift+E keyboard shortcut.
In the dialog box that opens, give the image a name with a ".png" extension in the text box at the top (or at the bottom depending on your OS). Select where you want to save the image and click on the Export button at the bottom right corner.
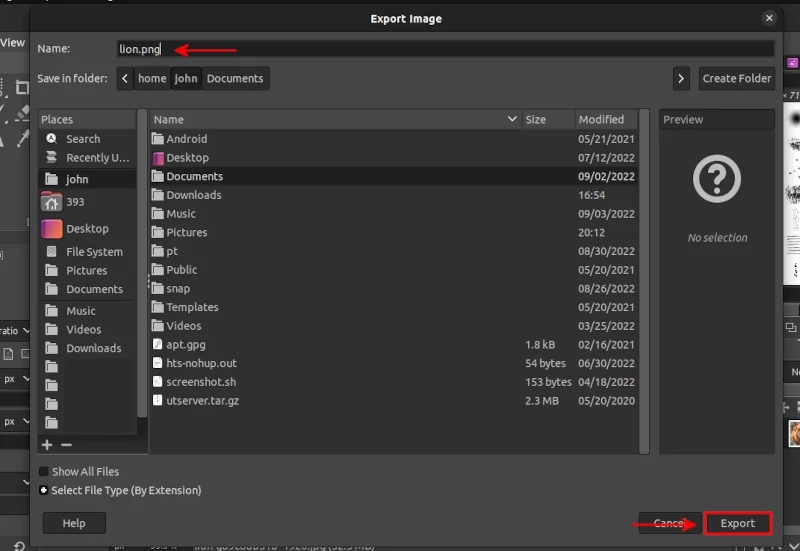
Click on the Export button in the next small pop-up window that opens.
Below is the image after cropping it to a circle and saving it.

That's it!
Now you know how to crop any image to a circular shape using GIMP.

