How to set up a Guest Wi-Fi on Huawei HG8546M router
The world has become a global village where we keep in touch with friends and family members miles away through the Internet.
People are so attached to the web and social media to an extent that a short period of disconnection from the internet will make them feel completely out of place. A person will visit your home or office and the next thing they do after greetings is asking for the Wi-Fi password.
Sharing the Wi-Fi password for the home network does not look harmful but can pose a major security threat.
If a visitors' device is infected with malware and then he/she connects it to your Wi-FI network, the malware can spread over the local network and try to contaminate other devices connected to the network.
Here is where a Guest Wi-Fi network comes to your rescue.
A guest Wi-Fi network is basically an access point on your router separate from the one your primary devices connect to.
Setting up a Guest Wi-Fi network can help you add a level of security while being hospitable to your visitors.
Using this network your guests can access the Internet without having access to your home network attached devices (eg computers, Tv, printer, etc).
This means you can keep the primary network to yourself (all your devices) and have all the visitors using the more limited guest network.
If the guest's device is infected with malware and they connect to your guest network, you can rest assured that your important data and the security of connected devices won’t be compromised.
Most routers allow you to create a Guest Wi-Fi network via their management interfaces.
In this article, I will show you through a step-by-step process how to create and set up a Guest Wi-Fi network in your Huawei Echolife HG8546M router.
Creating a Guest WiFi network in a Huawei Echolife HG8546M router
Follow the steps below:
Step 1: Log in to your router web interface.
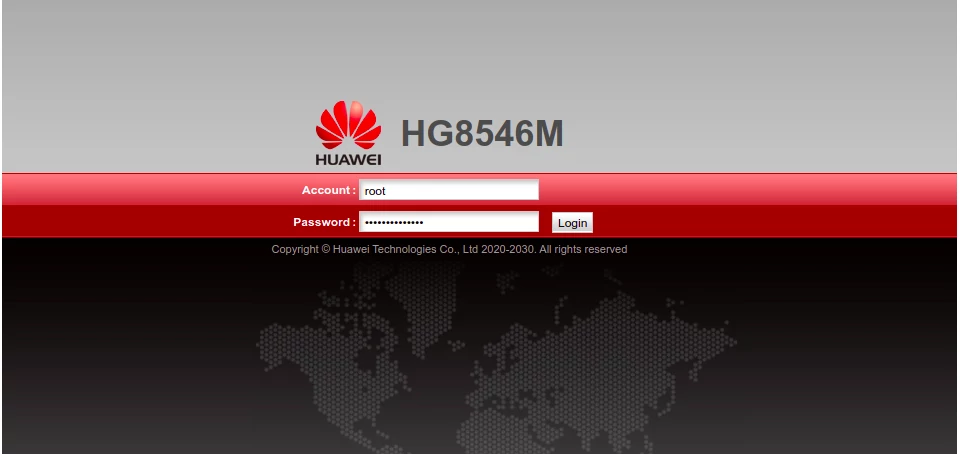
To do so, enter the IP address 192.168.100.1 in your browser address bar and hit enter. This will open a login page with Account and Password fields as shown below. The Account value is root. If you are logging in for the very first time, the password is adminHW. Else, if you had changed the router login password before then use that instead. Then click on the Login button.
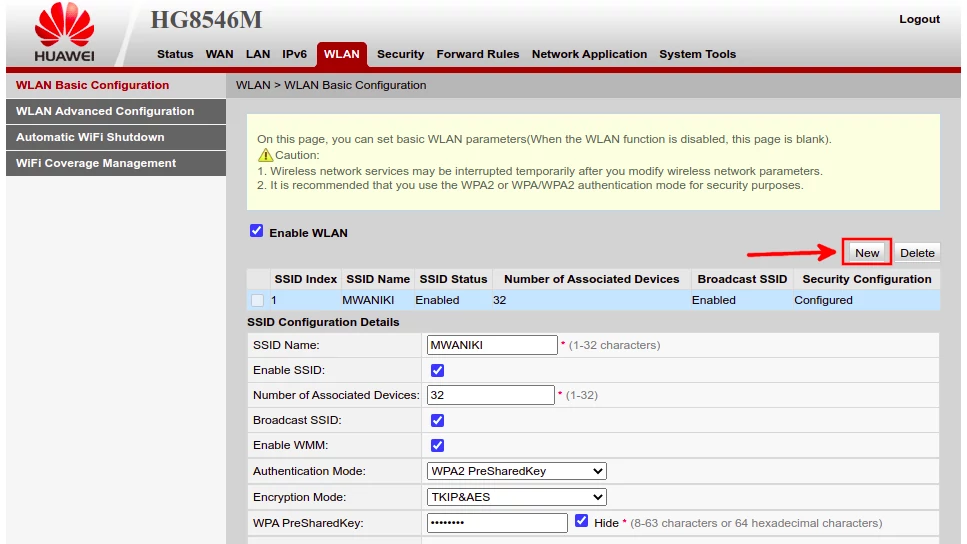
Step 2: Click on the WLAN link at the top menu.

Step 3: You will be taken to the Wi-Fi network configuration page with your current Wi-Fi network details. Click on the New button to set up a guest Wi-Fi network.
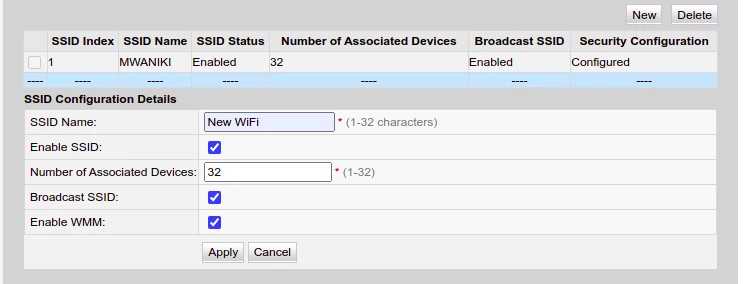
Step 4: Enter your preferred WiFi name in the SSID Name field. Tick/check the Enable SSID checkbox. Enter the maximum number of devices you would want to connect to the WiFi network where the maximum value you can input is 32. Leave everything else as is and click on the Apply button.
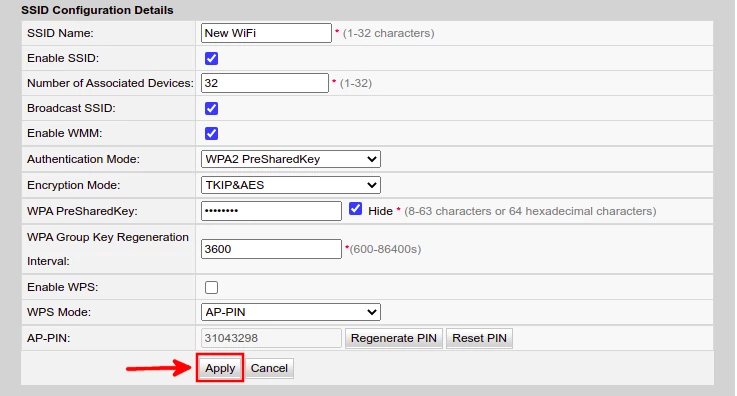
Step 5: Your WiFi network will be created and you will be able to see it listed in the table. Tick its checkbox in the left column of the table to have it selected. Its configuration details will appear below the table.
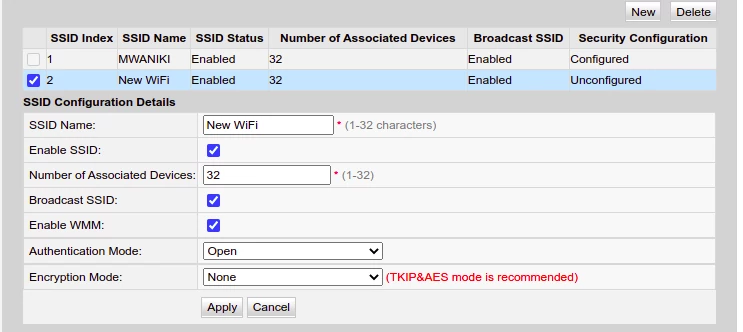
- Select WPA2 PreSharedKey in Authentication mode.
- Select TKIP&AES in Encryption Mode.
- Enter your preferred password for the WiFi in the WPA PreSharedKey field. It should be at least 8 characters in length. You can uncheck the Hide checkbox to show the password as you type it in.
Leave everything else as is and click on the Apply button to save the changes.
That's all, the WiFi network is created and its login password set.
Now when friends and family visit your home or office, just ask them to connect to this new WiFi and share its password with them. You rest assured of your devices' security.
Conclusion
In this article, you have learned what a Guest Wi-Fi network is and why it is important and how you can create and set up one by yourself via the router's management interface for the Huawei HG8546M and other Echolife router series.

